
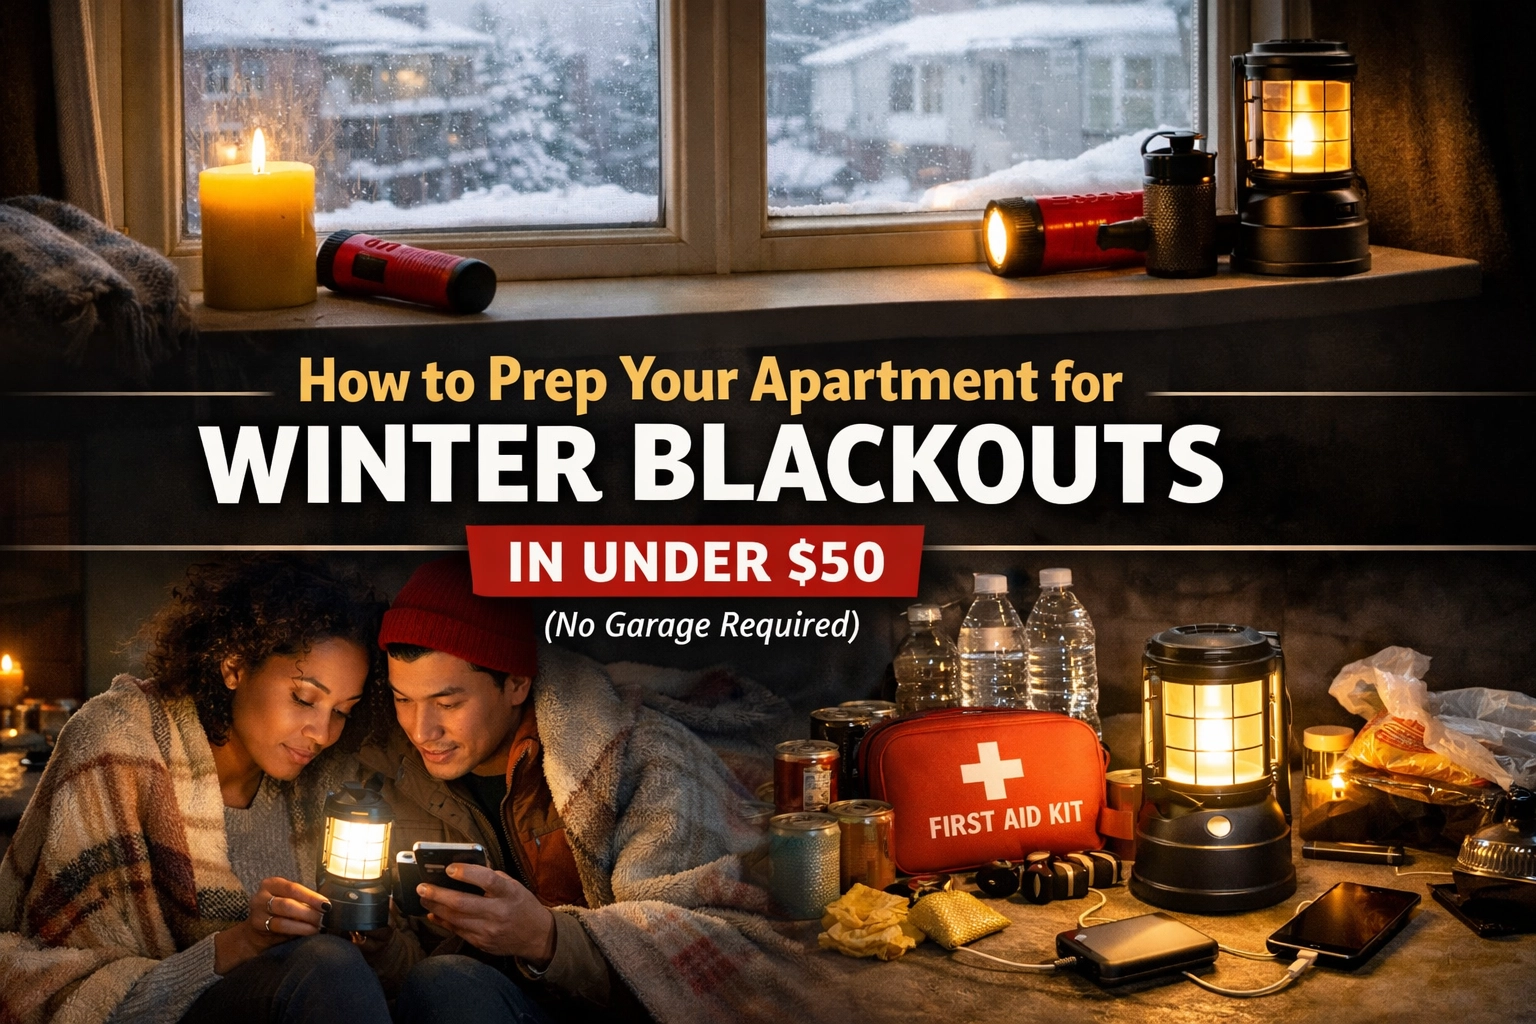
Thanks to that famous groundhog, we still have more winter to get through, and the “Ides of March” are a real thing. Let’s be real: most emergency prep advice assumes you’ve got a garage full of generators, a basement stocked like a bunker, and a Costco membership used weekly. But what if you’re living in a 600-square-foot apartment with closet space the size of a shoebox?
You can absolutely prep for winter blackouts without breaking the bank or needing a storage unit. Here’s how to winterize your apartment for under $50, because being prepared shouldn’t require a second mortgage or a yard. And – bonus! – stores are already gearing up for Spring, so you may snag some winter gear to be ready for next year and save a few bucks as well.
Why Winter Blackouts Hit Apartments Differently
When the power goes out in winter, apartment dwellers face unique challenges. You can’t run a generator on a balcony (carbon monoxide poisoning is a thing). You probably don’t have a fireplace. And if you’re on an upper floor, hauling water up four flights of stairs during a freeze isn’t exactly fun.
The good news? Apartments actually have some advantages. Your neighbors’ body heat helps insulate your space. You’ve got less square footage to keep warm. And you’re likely closer to emergency services and warming centers if things get really bad.
Let’s make the most of what you’ve got.
Your $50 Budget Breakdown
Here’s how we’re splitting that fifty bucks to cover all your bases:
- Warmth & Insulation: $18
- Lighting: $12
- Food & Water: $15
- Safety & Extras: $5
Warmth & Insulation ($18)
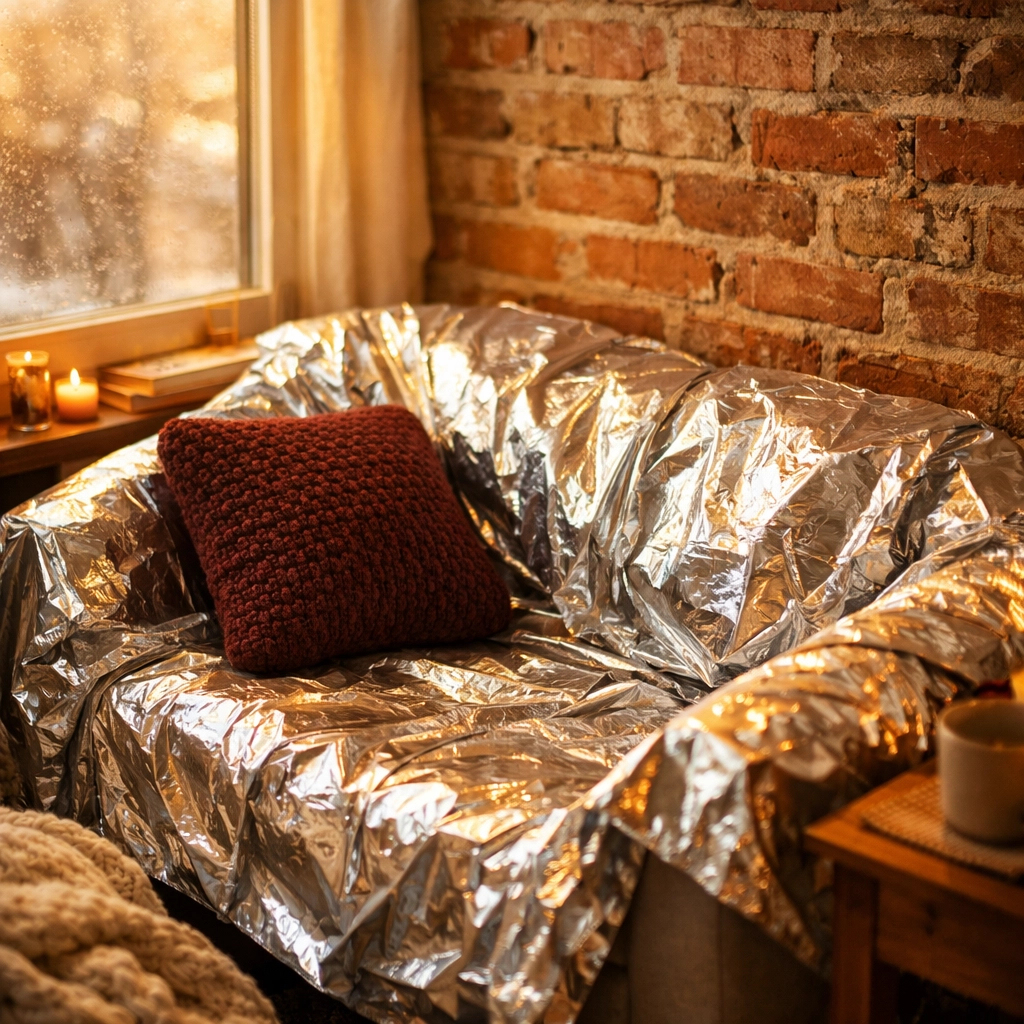
Mylar Emergency Blankets ($8 for a 4-pack)
These space-age-looking blankets are absolute game-changers. They reflect up to 90% of your body heat back to you, weigh almost nothing, and fold down to the size of a deck of cards. Toss one in every closet, your car, and your work bag.
Pro tip: Hang one behind your couch or bed as a heat reflector. Your body heat bounces off it instead of being absorbed by the cold wall behind you.
Heavy-Duty Clear Plastic Sheeting ($6)
Head to the paint aisle at any hardware store and grab a roll of clear plastic sheeting. This isn’t about aesthetics, it’s about creating a barrier between you and those drafty windows. Use painter’s tape to secure it over your windows. It lets sunlight in during the day to passively heat your space, then traps that warmth at night.
DIY Draft Stoppers ($4 worth of materials, or free)
You don’t need to buy fancy draft guards. Roll up old towels, stuff them in old socks, or sew a simple tube from fabric scraps and fill it with rice or beans. Place these at the bottom of exterior doors and any rooms you’re not using.
The goal is to pick one room as your “warm room” and seal it off from the rest of the apartment. Less space to heat means staying warmer longer.
Lighting ($12)
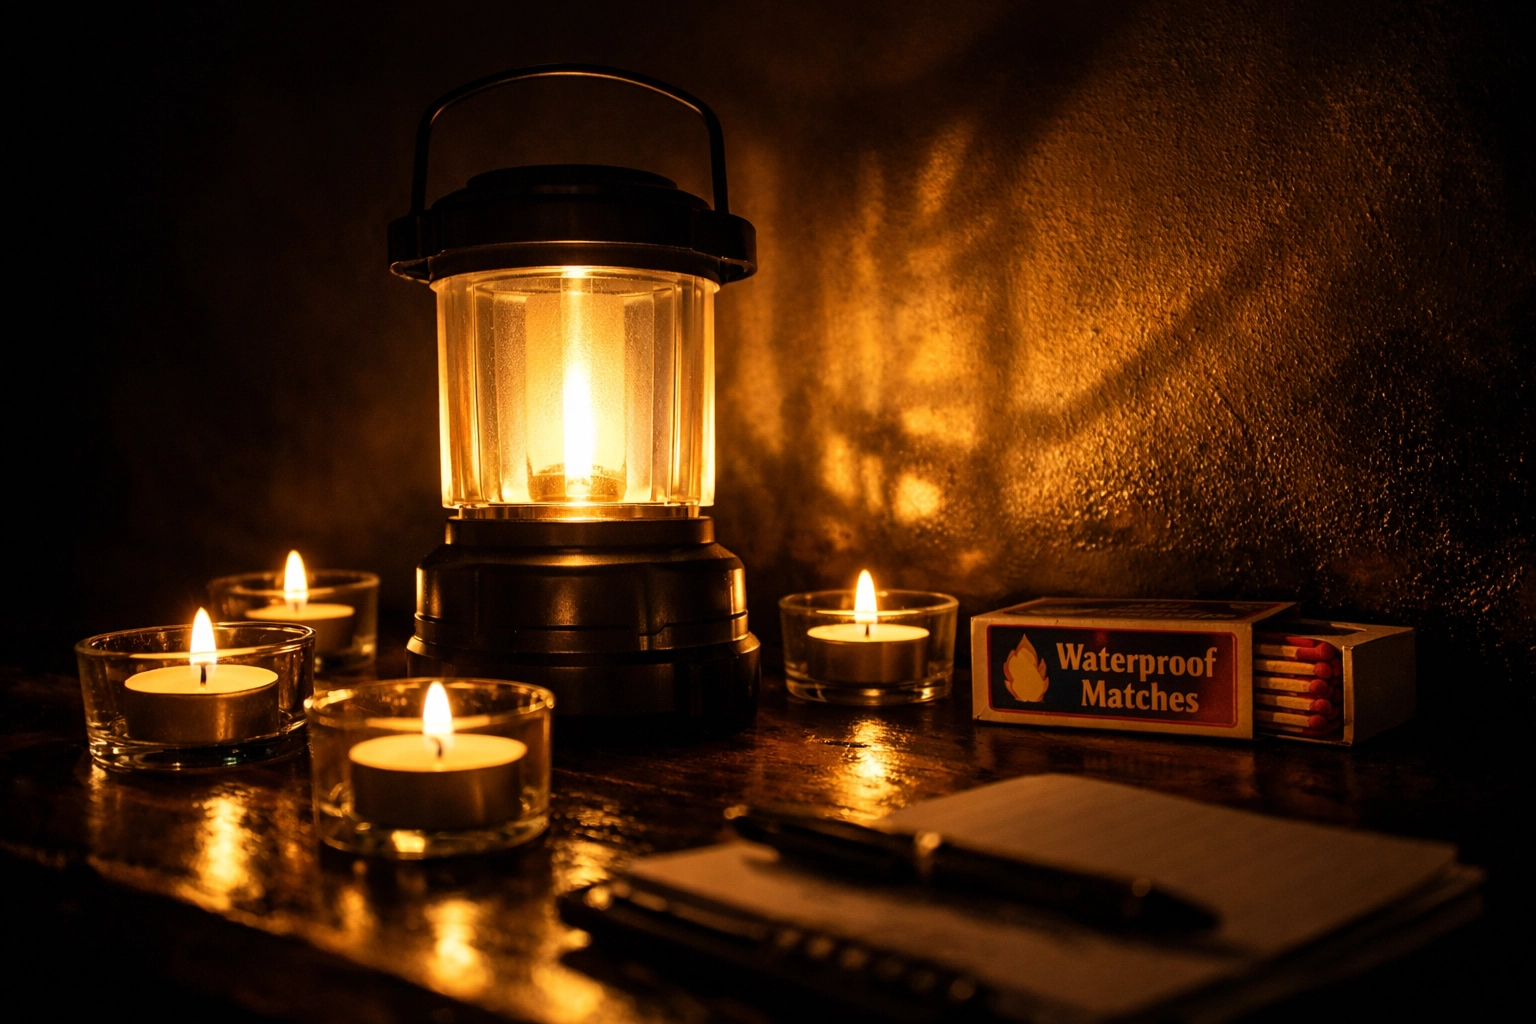
Battery-Powered LED Lantern ($7)
Skip the expensive tactical flashlights. A basic LED lantern from a big-box store provides 360-degree light that can illuminate an entire room. Look for one with adjustable brightness, the lower settings will make those batteries last days instead of hours.
Candles & Matches ($5)
Stock up on unscented tea lights or emergency candles. A pack of 100 tea lights runs about three bucks and can last you through multiple outages. If you can, and you have a safe area, get one of the 100-hour candles. Add waterproof matches or a couple of lighters.
Important safety warning: Never leave candles unattended. Keep them away from anything flammable (including those Mylar blankets). And please, skip the DIY “terracotta pot heater” hacks you see on TikTok/YouTube: While they can work, they produce minimal heat for the fire risk involved.
If you want to try a candle-based heater, stick to small, controlled setups: a single candle in a metal holder with a small heat-safe surface above it (like the bottom of a metal can) to radiate warmth. But honestly? Your body heat and proper insulation will do more for you than any candle heater.
Food & Water ($15)
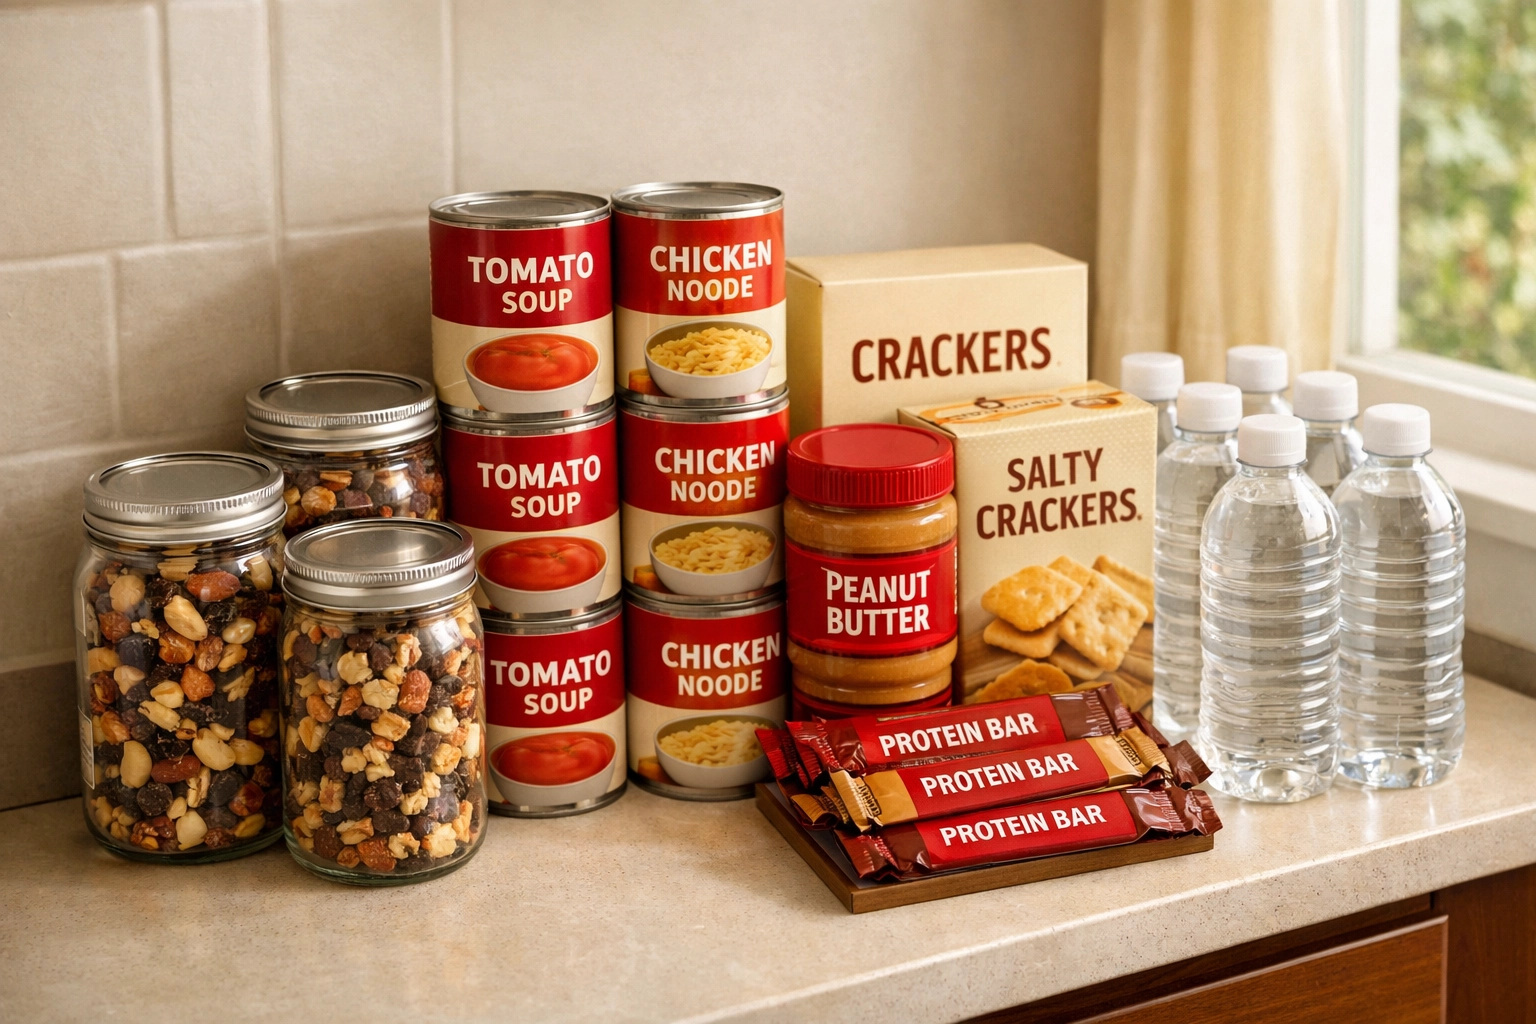
Shelf-Stable Snacks ($10)
You don’t need freeze-dried camping meals. Hit the regular grocery store and stock up on:
- Peanut butter (protein, calories, doesn’t need refrigeration)
- Crackers (carbs for energy)
- Protein bars (grab whatever’s on sale)
- Canned soup or chili (you can eat it cold if needed: not ideal, but doable)
- Trail mix or nuts (calorie-dense and filling)
Focus on foods that don’t require cooking and pack calories. You’re trying to fuel your internal furnace here.
Water Storage ($5)
Fill every pitcher, water bottle, and pot you own before a storm hits. But also grab a few gallons of bottled water from the store. If your pipes freeze or the water treatment plant loses power, you’ll be glad you did.
Don’t forget: your bathtub is a giant water storage container. Fill it up when you know a storm is coming. Use it for flushing toilets or washing: not drinking, unless you’ve got a way to purify it.
Safety & Extras ($5)
Basic First-Aid Supplies
You might already have these, but double-check: bandages, pain relievers, any prescription medications you need, and a small tube of antibiotic ointment. If you’ve got $5 left in the budget, a travel-size first-aid kit from the dollar store covers the basics.
Know Your Apartment’s Quirks
This costs nothing but could save you thousands:
- Find your water shut-off valve. If you rent a space that has access and a pipe bursts, you need to act fast.
- Test your smoke and CO detectors. Replace batteries if needed.
- Locate your breaker box. Know which switches control what.
- Check your lease for emergency protocols. Some buildings have generator power for hallways or communal spaces.
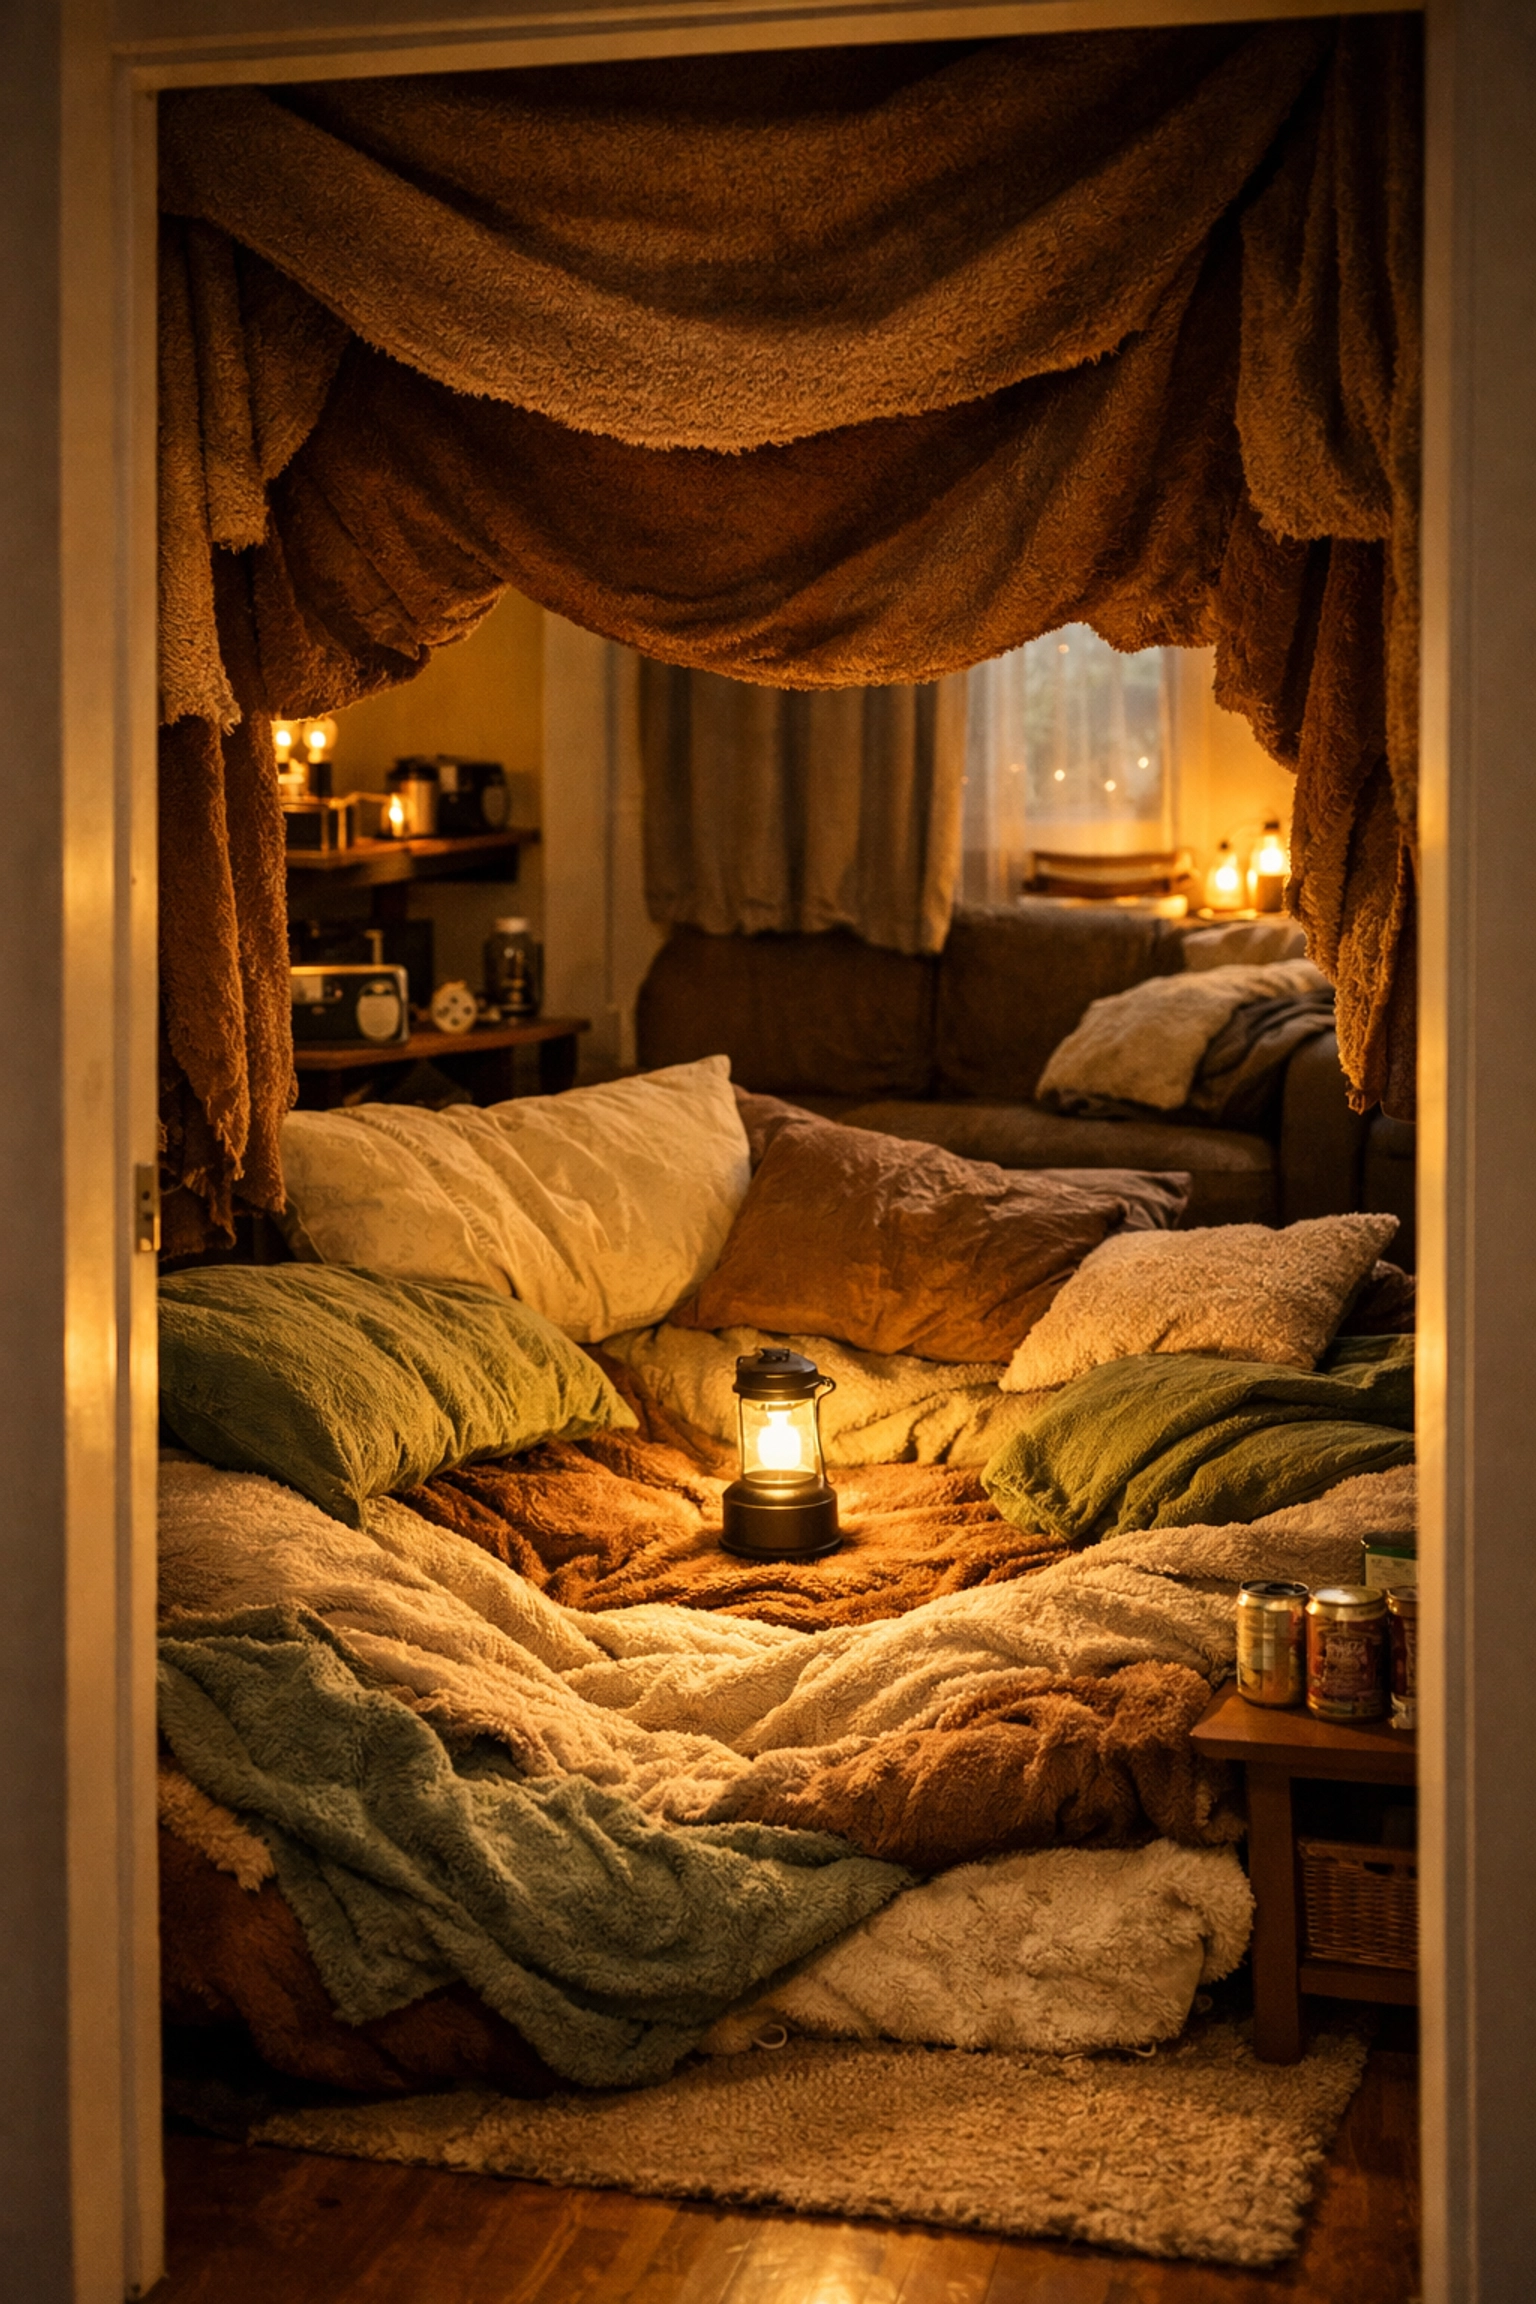
The One-Room Strategy
Here’s the secret sauce for staying warm in an apartment during a blackout: concentrate all your resources in one room, preferably an interior room with the fewest windows.
Set up camp with your blankets, snacks, water, and light sources. Close doors to other rooms. Hang blankets over doorways for extra insulation. If you’ve got kids, turn it into a “camping adventure” in the living room.
Body heat is your best friend. Pile on layers, snuggle under blankets, and stay together. You’d be surprised how warm a small room can stay with just human heat and proper insulation.
What About Staying Informed?
A battery-powered radio (especially a NOAA radio) is ideal for emergency updates, but most of us already have smartphones. Keep yours charged when you know a storm is coming. Grab a cheap portable power bank if you’ve got a few extra bucks: they’re often on sale for under $10 and can give you at least one full phone charge.
The Real Talk: When to Leave
Prepping is great, but it’s not about toughing it out to prove a point. If your apartment drops below 50°F and you can’t get warm, it’s time to go. Check if your city has warming centers open during emergencies. Many libraries, community centers, and schools become designated shelters.
There’s zero shame in leaving. Getting hypothermia in your apartment because you “didn’t want to bother anyone” is not the flex you think it is.
Beyond the First $50
Once you’ve got these basics covered, here’s what to add when you’ve got a little more budget:
- A better flashlight or headlamp
- More food and water (two weeks’ worth is ideal)
- A camping stove for your balcony (if allowed) or a small butane burner
- Extra batteries in various sizes
- Phone charging cables and power banks
But start with the fifty-buck basics. It’s enough to keep you safe, warm, and fed through a typical winter outage.
Your Apartment Is Your Advantage
Stop thinking of your apartment as a limitation. It’s actually easier to prep a small space than a whole house. You need less stuff, less money, and less space to store it all.
You’ve got this. Winter storms are inevitable, but being unprepared doesn’t have to be.
Ready to Level Up Your Prep Game?
Want more budget-friendly prep tips and real talk about emergency readiness for urban women? Sign up for my newsletter and get practical advice delivered straight to your inbox: no doomsday fear-mongering, just helpful info you can actually use.
And don’t forget to check out my latest podcast episode, where I’m diving deep into apartment prep strategies that actually work. Because being prepared should fit your life, not the other way around.